New To Cycling? Start Smart!
Thinking about buying a bicycle and riding for the first time in a long time? Maybe you already have a bike but you feel a little bit rusty about cycling basics.
Have no fear! We know how daunting cycling may seem when you haven't done it for a while. And, we love beginners and are always happy to offer pointers on how to best use your bicycle. Since we aren't available 24/7 at the shop, we''ve created this article that you can read at your convenience to quickly get back up to speed and start enjoying the wonderful world of cycling again!
 |
 |
 |
 |
Mounting
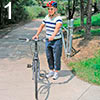
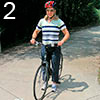
It sounds easy but this can actually be tricky. While there are actually a variety of ways to get on a bicycle, we recommend starting with the safest, most secure method. Which is to lift one leg over the top tube of the frame so that you're straddling the bike with both feet on the ground. Lift the foot that matches your most-used hand. If you write with your right hand, you'll probably want to use your right foot.
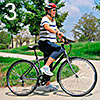
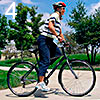
If it's your right foot, move your right pedal backward until it's toward the top of the pedal stroke, at about the 2 o'clock position (photo 3). Now to get on your bike, put your foot on the pedal and push down while simultaneously shifting your body up and back onto the seat. Hold onto the handlebars and keep going straight. It helps to look forward down the road or trail, too, not down at your pedals or the ground. Now that you're rolling, just put your opposite, or anchor foot, on the other pedal and you're off! Keep in mind that you can easily apply the brakes, stop and get your feet down if you're not feeling safe and comfortable.
Tip: Start in an easy gear so pedaling is easy. Starting in a hard gear is a lot like starting your car in 4th gear. It's difficult and might cause you to stall. Also, you can practice on grass to perfect your mounts and dismounts.
Pedaling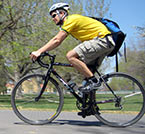 Now that you're on the bike, let's make riding easy. Make sure you place the balls of your feet on the pedals. This is the best way to channel your leg power into forward motion and it also offers better bike control than other foot positions. If you have trouble reaching the pedals with the balls of your feet, contact us to adjust your bike fit. We also recommend using closed-toe shoes with flat, grippy bottoms that ensure you don't slip off the pedals.
One place you don't want to pedal is in corners. Try coasting through with your inside leg up. This means that if you're turning to the left, you want to have the left pedal up, if you're turning to the right, keep your right pedal up. Keep the pedal at 12 o'clock, or at the top of the pedal stroke, as you enter the turn and keep it up until you exit the turn. Beginning to pedal too soon could result in your pedal hitting the ground which will disrupt your ability to handle the bike.
Tip: Make sure your saddle is at the correct height to enable optimum pedal power. A saddle that's too low may force your knees outward, which can be uncomfortable. A seat that's too high can make it hard to reach the pedals and even harder to control the bicycle. See us if you're unsure about correct seat height or bike fit.
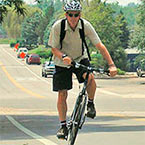 Standing Pedaling
Struggling to get up hills? Standing while pedaling is a great way to use your body weight to your advantage and make climbing easier. When you stand, all of your weight falls on the pedals at the top of the stroke so your muscles don't have to do all the work. The most efficient way to do this is to allow the bike to rock from side to side while your body remains in a central position.
To rock the bike, let all the side-to-side movement come from your elbows and below. As you lightly move your wrists to the right and the left you should feel the tip of the seat rubbing the back of that side's leg. As you get more comfortable with standing, you'll be able to move slightly forward on the bike. Now no hill will stop you!
Tip: Get ready to rock (yeah!) by standing on the pedals without pedaling. While coasting slowly, simply straighten your legs and stand. Once you feel comfortable with this, practice leaning the bike from one side to another, while keeping your body in a central position. You'll be rockin' and climbing like a champ in no time.
 Shifting
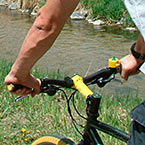
When it comes to making riding easier, there are few things more effective than shifting gears, which is why most bicycles designed for road and off-road use today include geared drivetrains. These gears simply multiply the effort of your legs, so for each pedal stroke you take, the bike covers more distance. Having multiple gears makes it easier to ride when hills, wind or rough terrain slow you down. And, it helps you cover long distances with less energy.
All this is as easy as shifting to a gear that you feel comfortable in. Remember, there's no such thing as a right or wrong gear, just one that you feel more or less comfortable in. On some rides you may shift often, on other rides you might not shift much at all, but the gearing is always there meaning you can switch if you need to.
Shifting is easy, too. There are usually two shift levers: one on the right that makes small changes in pedal effort with a greater number of choices; and one on the left that makes large changes in pedal effort with fewer choices.
As you click through the gears, be sure to keep pedaling because the shifting mechanism, called a derailleur, works best if you're pedaling lightly while you ride. Never try to shift while you stomp on the pedals because that puts too much tension and pressure on the chain making it resist moving sideways. So, the harder you pedal the less smooth the shift, the lighter the smoother.
With a little practice you'll find yourself looking down the road and trail anticipating the gear that'll be right for the terrain and you'll shift before you get there. Just remember that you usually use the right lever more frequently to make minor changes in pedaling effort, while the left lever lets you make a bigger difference.
The video here explains the basics, and please keep in mind that we're always happy to answer any shifting questions you have or even demonstrate how we would shift your bike.
Tip: Practice shifting in a parking lot or little-used cul-de-sac. You'll get used to the motion and be ready for hills, wind and that quick-changing stop light.
 Braking
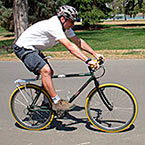
Sooner or later you're going to need to stop your bike and we want to make sure it's easy and effective for you. Remember, modern brakes can be very powerful and that's a good thing. Due to this stopping power, it's important to squeeze both brakes evenly, and at the same time. Practice this in an abandoned parking lot or empty street so that the motion will be a reflex when you really need it.
Once you've mastered the amount of lever pressure needed, practice shifting your body weight back for when you need to make an emergency stop, like if a car pulls out in front of you. You can do this by pushing backward against both pedals and extending your arms so that you're pushed back and off the seat. This is a sure way to stay balanced when you have to stop in a hurry and it will prevent you from getting thrown forward and going over the bars when trying to stop fast. Be safe out there.
Tip: Make sure your brakes are adjusted correctly. If you can squeeze the levers all the way to the bars, or if you have to squeeze too hard to slow or stop, it's time for a brake check-up.
Steering Steering a bicycle is an art form in itself. However, you can master the basics easily by remembering to steer as little as possible. The bicycle is not like a car; it does have a steering device but body position plays a crucial part in getting your bike around corners. Leaning your bicycle, rather than turning your bars, is best in 95% of cornering situations. Keep your arms and upper body loose and relaxed to absorb slight bumps or vibrations and start slow so you get used to the feel.
Ride straight as you cross train tracks and lips in the pavement too. These are easy to ride over when you're used to them. However, unsuspecting riders can be in for a shock if they cross the wrong way. The problem is that many train tracks cross roads at an angle. That angle can catch a wheel, usually the front wheel where your steering is, and turn it quickly, causing you to fall.
Tip: Approach all train tracks at a 90-degree angle. Make sure no cars are around and move slighltly right or left as required by the track angle. As you cross the tracks, move slightly to the opposite side so that your path keeps you at a 90-degree angle, or as close to it as possible. Voila! You've just crossed safely. Keep in mind that tracks are especially slippery when wet. If you can't cross at a 90-degree angle it's safest to walk across.
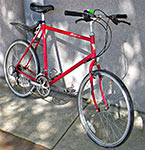 Parking
Last, but not least, we thought we'd mention the tricky topic of bike parking. Sure, it's easy if you have a kickstand, but what do you do if you don't (not all bikes accept kickstands)? We usually recommend leaning the bike up against the nearest grippy surface. The key is to do it so that your bike won't roll, fall over and get damaged.
Try leaning the bike's non-drive side (where the gears aren't) against the wall with the seat and handlebars as the contact points. Place the bike at an angle so that the wheels are several inches further away than the seat. This will prevent the bicycle from tipping over. Position the rear tire closer to the wall than the front. Ideally, the rear tire might even butt up against the wall to create enough friction that the bike won't roll away, fall or slide down. That's what you're trying to avoid.
This bike-lean technique can work almost anywhere. If a wall isn't handy, try leaning your bike against a tree or sign post. Here's a trick that's good to know for this: Position the bike so the non drivetrain side is next to the post and lean it so the indentation in the side of the seat rests fully against the post you're using to park your bike. The seat is wider in the back so it will prevent the bike from rolling forward. To finish your post parking job, backpedal by hand or foot until the pedal on the post side comes up and touches the post. This will "lock" the bike in place by keeping it from rolling backward too.
Never rest your frame against a post to park your bike because frame tubes and paint jobs are easily damaged. And, keep in mind that if your bicycle falls over it can get damaged. So, if you're not sure it'll remain standing the best way to park it is to gently lay it on the ground. Be sure to lay the left side down (non drive side). And putting it on grass is safest. If you have to lay it on the road be certain there's no way anyone will run over it in their car because they couldn't see it down there.
Tip: Don't hurry when you park and risk your bike falling over and getting damaged. Take your time and make sure it's secure, even if the wind picks up or someone parks next to you. Make sure your bike stays safe.
We hope these basic tips help you enjoy cycling. Obviously there's a lot more to know and we offer a wealth of information right here on our website. Be sure to browse around and read as much as you like. We may be expert cyclists now, but we still remember our first rides and we enjoy helping people get into cycling. We look forward to assisting you with all your bike, accessory and riding needs.
